Transform Empty Spaces into Stunning Showrooms with Virtual Staging
Transform empty rooms into stunning showcases through virtual staging – the game-changing skill revolutionizing modern real estate marketing. Whether you’re launching a virtual interior design career or enhancing property listings, mastering digital staging combines creative vision with technical precision. This comprehensive guide breaks down professional virtual staging into manageable steps, from selecting the right software tools to implementing designer-approved techniques that create photorealistic results.
Learn to manipulate lighting, add furniture, and adjust room proportions using industry-standard applications while maintaining architectural accuracy and design authenticity. Discover how top real estate professionals transform vacant spaces into compelling, emotionally-resonant environments that help properties sell faster and for higher prices. Whether you’re a seasoned designer or complete beginner, these proven techniques will elevate your virtual staging skills to professional standards.
Essential Virtual Staging Tools and Software
Choosing the Right Software
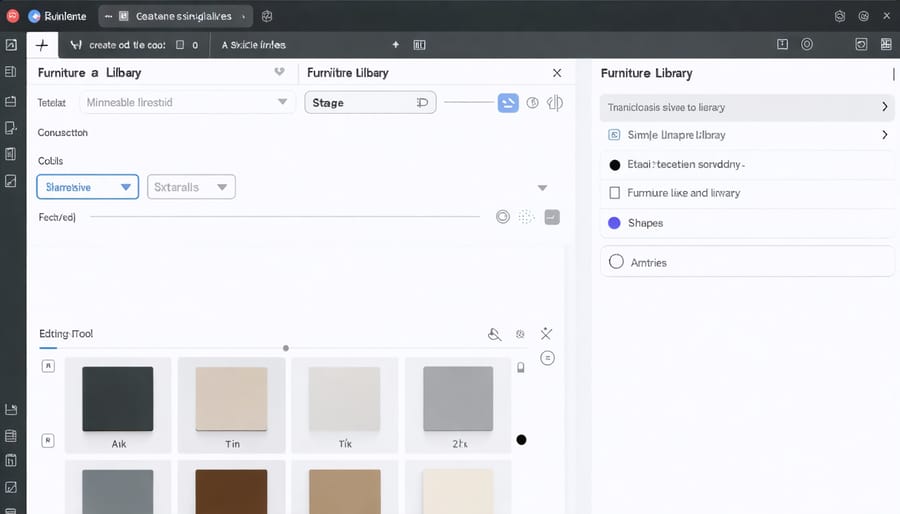
Selecting the right virtual staging software can make or break your project. Today’s market offers several excellent 3D interior design tools that cater to different skill levels and needs.
For beginners, BoxBrownie and Virtual Staging Solutions offer user-friendly interfaces with drag-and-drop functionality and extensive furniture libraries. These platforms are perfect if you’re just starting out and want professional results without a steep learning curve.
More advanced users might prefer programs like Visual Stager or Occupied, which provide greater customization options and realistic lighting effects. These interactive design platforms often include features like custom furniture uploads and advanced shadow control.
When choosing your software, consider:
– Your budget (prices range from $15-150 per image)
– Required skill level
– Furniture library size
– Output quality
– Processing time
– Customer support availability
Most platforms offer free trials or sample images, so test a few before committing to find the perfect fit for your virtual staging needs.
Required Hardware and Setup
To get started with virtual staging, you’ll need a reliable computer with decent processing power – most modern laptops or desktops from the last 3-4 years will work fine. Your system should have at least 8GB of RAM and a mid-range graphics card to handle image editing smoothly.
Essential equipment includes a good quality camera (a smartphone with a 12MP+ camera can work) for taking clear property photos. You’ll also need photo editing software – popular choices include Adobe Photoshop, SketchUp, or specialized virtual staging software like Virtual Staging Solutions or BoxBrownie.
Make sure you have a stable internet connection for downloading and uploading files, and plenty of storage space for your photos and staging assets. A color-calibrated monitor is recommended but not mandatory – it just helps ensure your staged photos look consistent across different devices.
For comfort during long editing sessions, invest in a good mouse rather than relying on a trackpad. A dual-monitor setup can be helpful but isn’t essential for beginners. Remember, while better equipment can make the process smoother, skill and practice matter more than high-end gear.
Preparing Your Space for Virtual Staging
Photography Best Practices
Before diving into virtual staging, capturing high-quality photos is essential for achieving professional results. Start by decluttering the space completely and opening all blinds and curtains to maximize natural light. Schedule your photoshoot during the golden hours (early morning or late afternoon) when sunlight is softer and more flattering.
Use a DSLR camera or a high-end smartphone with HDR capabilities. Always shoot in landscape orientation and maintain a straight horizon line by using your camera’s grid feature. Position yourself in doorways or corners to capture the maximum amount of space, and shoot from chest height (about 5 feet) to create the most natural perspective.
For each room, take multiple shots from different angles, ensuring you capture the entire space. Use a tripod to prevent camera shake and enable HDR bracketing for better exposure control. When photographing, keep the camera perpendicular to the walls to avoid distortion.
Pay special attention to lighting. Turn on all interior lights to create a warm, welcoming atmosphere. If needed, use additional lighting equipment to eliminate harsh shadows. Avoid using flash as it can create unrealistic reflections and hot spots.
Finally, shoot in RAW format if possible, as this provides more flexibility during post-processing. Take wide-angle shots but avoid extreme wide angles that might distort the room’s proportions. Remember, the better your original photos, the more realistic your virtual staging will look.
Image Preparation Techniques
Before diving into virtual staging, it’s crucial to prepare your property photos properly. Start by ensuring your base photos are high-resolution (at least 3000×2000 pixels) and well-lit. Remove any existing furniture, personal items, or distracting elements using photo editing software like Adobe Photoshop or GIMP.
When cleaning up your images, focus on creating a blank canvas. Use the clone stamp and healing brush tools to remove unwanted objects and repair any visible wall damage or imperfections. Pay special attention to shadows and reflections that might reveal removed items.
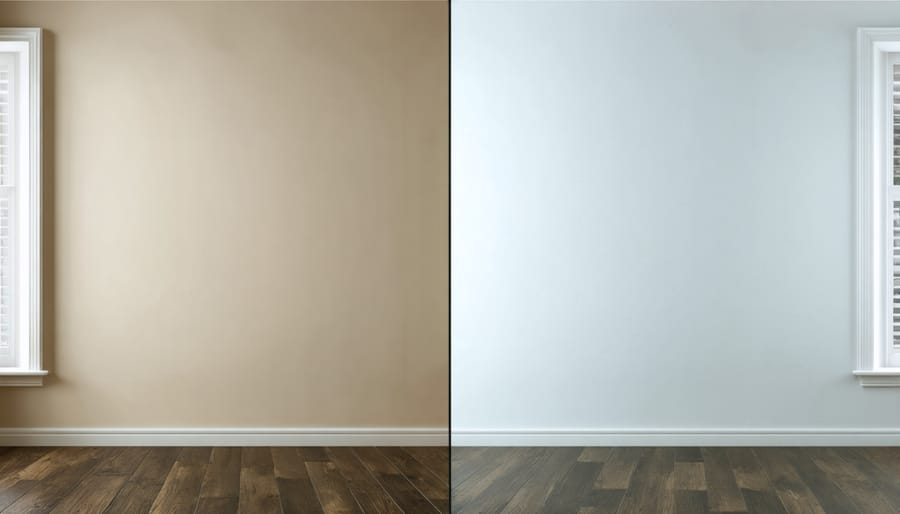
For optimal results, adjust the brightness, contrast, and white balance of your photos. This helps create a natural, well-lit appearance that will make your virtual staging look more realistic. If your photos have a color cast, use the color balance tool to neutralize it.
Consider straightening any crooked lines, especially in architectural features like doorways and windows. The perspective correction tool can help fix any distortion caused by wide-angle lenses, which are commonly used in real estate photography.
Export your prepared images in JPEG format with a quality setting of 80-100%. This ensures good image quality while keeping file sizes manageable for virtual staging software. Remember to save your original files separately in case you need to make adjustments later.
Before proceeding with virtual staging, double-check that your cleaned images have consistent lighting and perspective across all rooms. This consistency will make the final staged photos look more cohesive and professional.
Step-by-Step Virtual Staging Process
Furniture Selection and Placement
When selecting virtual furniture, aim to match the property’s style and target market. Choose pieces that complement the room’s architecture and create a cohesive look. For contemporary spaces, opt for clean lines and modern designs, while traditional homes benefit from classic pieces with timeless appeal.
Scale is crucial in virtual staging – ensure furniture proportions match the room dimensions. A common mistake is overcrowding spaces with oversized pieces or using furniture that’s too small, which can distort the room’s perceived size. Use the room’s measurements as a guide when selecting furniture dimensions.
For placement, follow basic interior design principles. Create clear pathways through rooms by leaving at least 30 inches of walking space. Position larger pieces like sofas against walls to anchor the space, and arrange seating to encourage conversation. In bedrooms, center the bed on the main wall and flank it with proportionate nightstands.
Layer your staging with appropriate accessories, but don’t overdo it. Add throw pillows, area rugs, and artwork to create warmth and interest. Remember to maintain balance – if one side of the room feels heavy, add elements to the opposite side to create visual equilibrium.
When staging different rooms, ensure a consistent style flows throughout the property. This doesn’t mean everything must match exactly, but there should be connecting elements in color, style, or texture that tie spaces together.
Lighting and Shadows
Lighting and shadows can make or break your virtual staging project, as they’re crucial for creating a realistic, lived-in atmosphere. Start by observing the natural light sources in your original room photo, including windows, doorways, and existing light fixtures. These will serve as your reference points for adding virtual lighting effects.
When placing virtual furniture and decor, ensure the shadows fall consistently with these light sources. If sunlight streams in from the left window, all objects should cast shadows toward the right. Pay attention to shadow intensity – objects closer to light sources cast stronger shadows than those further away.
Most virtual staging software offers lighting adjustment tools. Use these to fine-tune brightness, contrast, and shadow depth. A common mistake is creating overly harsh shadows that look artificial. Instead, aim for soft, subtle shadows that gently ground your virtual objects in the space.
For rooms with multiple light sources, remember that shadows will overlap and become lighter in intersecting areas. Consider the time of day shown in your original photo – morning light tends to be cooler and creates longer shadows, while afternoon light is warmer with shorter shadows.
Don’t forget about ambient light reflection. Light bounces off surfaces, especially in lighter-colored rooms, creating subtle fill lighting that softens harsh shadows. This detail adds that final touch of realism to your virtually staged space.
Adding Finishing Touches
The finishing touches in virtual staging can make the difference between a good render and a great one. Start by adding layers of accessories that tell a story about the space. Include throw pillows on sofas, artwork on walls, and carefully placed books or magazines on coffee tables. Remember to maintain balance – avoid overcrowding surfaces while ensuring the space doesn’t feel bare.
Consider incorporating plants to add life and organic elements to your virtually staged rooms. Mix different sizes and varieties, from floor plants in corners to small succulents on side tables. Modern augmented reality design tools can help you visualize exactly where these elements work best in your space.
Lighting accessories like table lamps, floor lamps, or pendant lights add warmth and dimension. Don’t forget practical items that make the space feel lived-in, such as coasters, vases, or decorative trays. Area rugs can anchor furniture groupings and add texture to your virtual staging.
For the final layer, add personal touches that create emotional appeal – family photos, art pieces, or decorative objects that reflect current design trends. Keep scale in mind when adding these elements, and ensure they complement rather than compete with your primary furniture pieces. Remember, less is often more – each accessory should serve a purpose in your overall design story.
Common Mistakes and How to Avoid Them
Even experienced virtual stagers can fall into common pitfalls, but being aware of these mistakes can help you avoid them and create more professional results. Here are the most frequent errors and their solutions:
Unrealistic Lighting and Shadows
Many beginners forget to match the lighting in their virtual furniture with the room’s natural light sources. To fix this, carefully observe where windows are located and ensure shadows fall in the correct direction. Adjust the brightness and contrast of added elements to match the existing room lighting.
Incorrect Scale and Proportion
One of the biggest giveaways of virtual staging is furniture that’s either too big or too small for the space. Always measure your room dimensions before adding virtual pieces, and use real-world furniture measurements as a reference. A standard doorway (typically 80 inches tall) can serve as a good scaling guide.
Poor Image Quality
Using low-resolution base photos or compressed virtual furniture assets can result in fuzzy, unprofessional results. Always start with high-quality, well-lit photographs and use premium 3D furniture models. Maintain image quality throughout the editing process by working with appropriate file formats and resolutions.
Overcrowding the Space
It’s tempting to showcase many furniture pieces, but overcrowding makes rooms look smaller and less appealing. Follow the rule of thumb: leave enough space for comfortable movement around furniture pieces. Remember, less is often more in virtual staging.
Inconsistent Style
Mixing different design styles or periods can create a jarring effect. Stick to a cohesive design theme throughout the space. Create a mood board before starting to ensure all virtual elements complement each other and the property’s style.
Forgetting Purpose and Function
Some virtual stagers focus too much on aesthetics and forget about practicality. Ensure your furniture placement makes sense for the room’s purpose. For example, don’t block windows, doorways, or natural traffic patterns, and include appropriate functional pieces for each room type.
By avoiding these common mistakes and following these solutions, you’ll create more realistic and effective virtual staging results that truly enhance property presentations.
Virtual staging has revolutionized the way we present and market properties, making it an invaluable skill in today’s digital real estate landscape. As we’ve explored throughout this tutorial, mastering virtual staging doesn’t require extensive technical expertise – just the right tools, attention to detail, and a creative eye.
Remember that successful virtual staging begins with high-quality photographs and careful planning. Whether you’re using professional software or user-friendly apps, the key lies in maintaining realism while enhancing the space’s potential. Start with simple projects, like adding furniture to empty rooms, before progressing to more complex transformations involving multiple design elements.
Don’t be afraid to experiment with different styles and arrangements, but always keep your target market in mind. The goal is to help potential buyers envision themselves in the space while maintaining a professional and authentic presentation.
As you begin your virtual staging journey, practice regularly and build your portfolio. Each project will help you refine your techniques and develop your unique style. Keep up with current design trends and continuously explore new tools and features as they become available.
With dedication and the knowledge you’ve gained from this tutorial, you’re well-equipped to create stunning virtual stagings that can significantly impact property marketing success. Take that first step today – your next virtually staged masterpiece awaits!