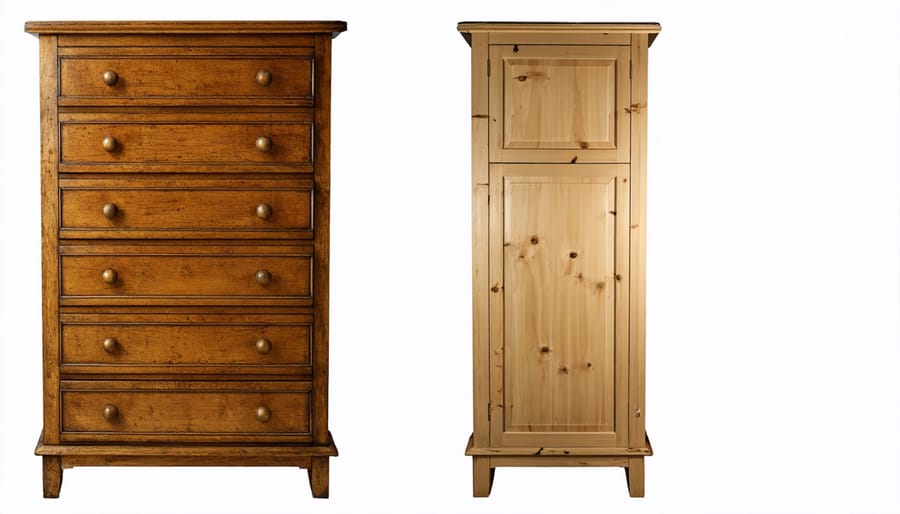
Save That Old Furniture: No-Sand Methods That Actually Work
Transform tired wood furniture without touching a sheet of sandpaper. Modern furniture restoration techniques make it possible to revitalize worn pieces using specialized deglosser solutions, chemical strippers, and innovative refinishing products. Strip away decades of wear using citrus-based removers that dissolve old finishes while protecting the wood’s natural grain. Apply liquid wood restorers containing natural oils and conditioners to penetrate deep into thirsty wood fibers, erasing scratches and water rings without aggressive abrasion. Layer chalk paint directly over existing finishes to create a fresh, modern look while preserving original details and character. These gentle restoration methods not only save time and prevent wood damage but also maintain the integrity of antique and vintage pieces that could be compromised by traditional sanding. Whether refreshing a family heirloom or updating a flea market find, these no-sand solutions deliver professional results with minimal mess and effort.
Why Skip the Sanding?
Sanding furniture can be a messy, time-consuming, and physically demanding process that many DIY enthusiasts prefer to avoid. While traditional basic restoration projects often include sanding as a crucial step, there are several compelling reasons to explore alternative methods.
First, sanding creates significant dust that can spread throughout your home, requiring extensive cleanup and potentially triggering allergies or respiratory issues. This is particularly problematic when working indoors or in spaces with limited ventilation. Additionally, some antique or vintage pieces have delicate veneers that could be damaged by aggressive sanding, potentially decreasing their value or compromising their structural integrity.
Time constraints are another factor to consider. Proper sanding requires multiple passes with different grit levels, which can take hours or even days to complete. For busy homeowners looking to refresh their furniture quickly, no-sand methods offer a practical alternative that can achieve professional-looking results in less time.
Modern restoration products have evolved significantly, with many specifically designed to bond to existing finishes without the need for extensive surface preparation. These innovative solutions often contain specialized adhesion promoters and leveling agents that can transform worn furniture while preserving its character and original wood grain.
By skipping the sanding step, you also avoid the risk of over-sanding, which can create uneven surfaces or completely remove decorative details that give pieces their unique charm. This makes no-sand techniques particularly valuable for preserving intricate carvings and maintaining the authentic patina of cherished furniture pieces.
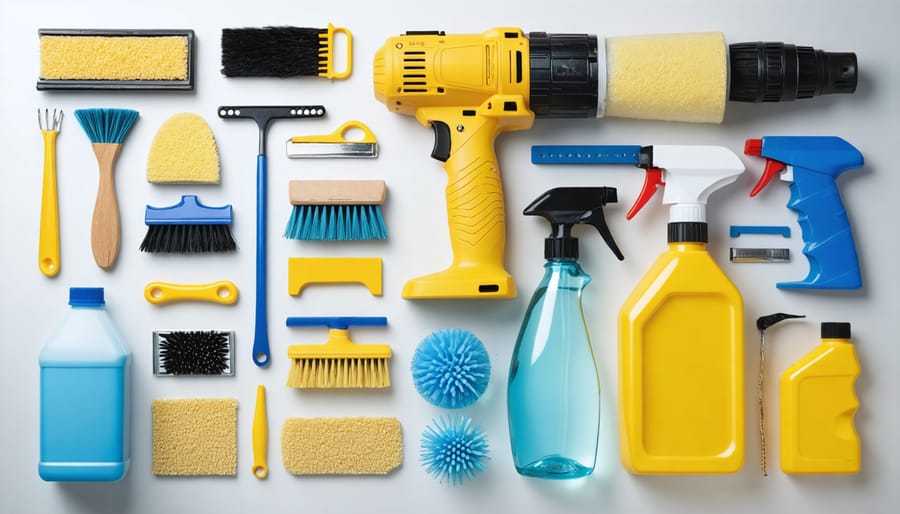
Essential Tools and Materials
Chemical Strippers and Degrossers
Chemical strippers and degreasers offer an effective alternative to sanding when tackling simple furniture repairs. These products break down old finishes, making them easy to wipe away without damaging the wood underneath.
For gentle restoration, citrus-based strippers work well on light finishes and are environmentally friendly. They’re perfect for antique pieces but may require longer working times. Methylene chloride-based strippers are more aggressive and work quickly on stubborn finishes, though they require proper ventilation and safety gear.
For surfaces with accumulated grime, commercial degreasers specifically formulated for wood can remove years of buildup. Look for products containing mineral spirits or naptha, which effectively dissolve oils and waxes while being gentle on the wood.
Always test your chosen product on a hidden area first, and follow the manufacturer’s instructions carefully. Apply the stripper evenly with a natural-bristle brush, and use plastic scrapers rather than metal ones to avoid scratching the wood. Remember to work in a well-ventilated area and wear appropriate protective equipment.
Cleaning and Preparation Materials
Before diving into the restoration process, gather these essential cleaning and safety materials. You’ll need several soft, lint-free cloths or rags, a gentle degreasing soap (like Murphy Oil Soap or dish soap), and white vinegar for deep cleaning. Have mineral spirits on hand to remove any stubborn grime or old finish residue.
For protection, invest in a pair of chemical-resistant gloves and safety goggles. If you’re working indoors, ensure proper ventilation and consider wearing a respirator mask, especially when using chemical cleaners. Keep paper towels nearby for quick cleanups.
Additional supplies include:
– Tack cloth for removing dust
– Clean spray bottle for cleaning solutions
– Microfiber cloths for applying products
– Plastic drop cloth to protect your work area
– Small bucket for cleaning solutions
– Cotton swabs for detailed cleaning
– Soft-bristled brush for texture areas
Store all cleaning materials in a dedicated container and keep them away from children and pets. Remember to label any mixed cleaning solutions clearly and never combine different cleaning products, as this could create harmful fumes.
No-Sand Restoration Methods
Chemical Stripping Method
Chemical stripping can be an effective way to remove old finishes without sanding, but it requires careful attention to safety and proper technique. Start by gathering your materials: a quality chemical stripper, protective gloves, eye protection, respirator mask, and plenty of ventilation.
Work in a well-ventilated area, preferably outdoors or in a garage with open doors. Before applying the stripper, lay down thick plastic sheeting to protect your work surface. Put on your safety gear – this step isn’t optional, as chemical strippers contain strong solvents.
Apply the stripper generously using a natural-bristle brush, working in one direction. Don’t brush back and forth, as this can cause the stripper to start drying. Let the product sit according to the manufacturer’s instructions, typically 15-30 minutes. You’ll know it’s working when you see the finish bubbling and lifting.
Once the finish has bubbled up, use a plastic scraper to remove the softened finish. Work in the direction of the wood grain to avoid damaging the surface. For detailed areas and carvings, use steel wool or a stripping brush to get into the nooks and crannies.
After removing the bulk of the finish, neutralize the stripper using mineral spirits or the manufacturer’s recommended solution. Wipe the surface clean with lint-free cloths, changing them frequently. Allow the wood to dry completely for at least 24 hours before applying any new finish.
Remember to dispose of used materials properly – chemical strippers and residue should never go down the drain. Check your local regulations for proper disposal methods.
Liquid Deglosser Technique
Liquid deglosser, also known as liquid sandpaper, offers one of the most efficient furniture revival methods available today. This chemical solution effectively breaks down the existing finish without the dust and effort of traditional sanding.
Start by working in a well-ventilated area and protect yourself with chemical-resistant gloves and a respirator mask. Clean the furniture thoroughly with a degreasing cleaner and let it dry completely. Pour a small amount of liquid deglosser onto a lint-free cloth – never apply it directly to the furniture surface.
Working in small sections, wipe the deglosser onto the wood using firm, even strokes that follow the wood grain. Don’t oversaturate the surface; a light coating is sufficient. You’ll notice the existing finish becoming dull and tacky as the chemical does its work. Let each section sit for about 15 minutes, or follow the specific product instructions on your bottle.
After the waiting period, wipe away any excess deglosser with a clean cloth. The surface should feel slightly rough to the touch, indicating it’s ready for the next step in your restoration process. Allow the piece to dry completely for at least two hours before applying any new finish or paint.
Remember that liquid deglosser works best on pieces with light to moderate wear. For heavily damaged furniture or intricate details, you might need to supplement this method with gentle spot sanding. Always test the deglosser on an inconspicuous area first to ensure it won’t damage your piece.
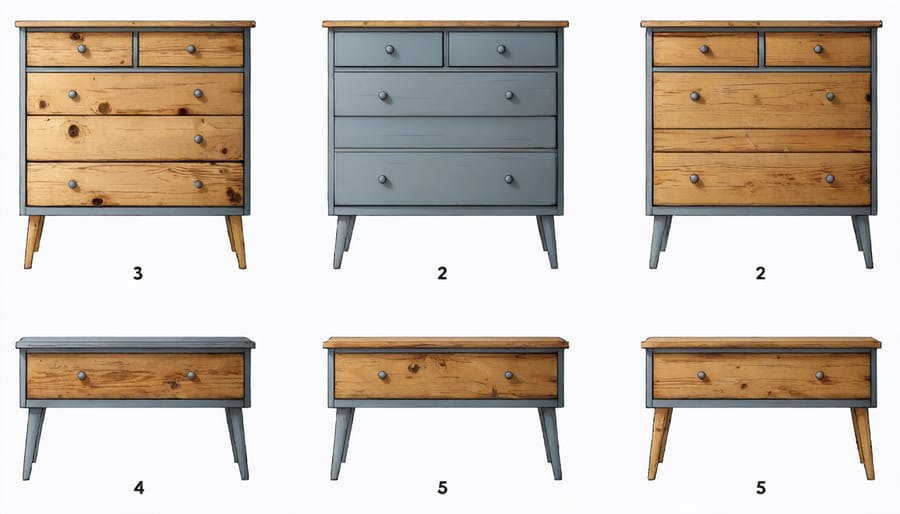
Chalk Paint Application
Chalk paint has revolutionized furniture restoration by eliminating the need for extensive prep work. Unlike traditional paints, chalk paint adheres exceptionally well to most surfaces without requiring prior sanding, making it perfect for quick furniture makeovers.
To begin your chalk paint project, clean your furniture piece thoroughly with a degreasing cleaner to remove any dirt, grime, or oils. Once the surface is clean and dry, you’re ready to paint. While primer isn’t necessary, you might want to use it if you’re working with raw wood or covering dark stains.
Apply your first coat of chalk paint using a high-quality brush, working in long, smooth strokes following the wood grain. The paint may look slightly streaky at first, but don’t worry – this is normal. Allow the first coat to dry completely, which typically takes 1-2 hours.
For best results, apply a second coat of paint. The second layer will provide better coverage and create that signature velvety finish that chalk paint is known for. If you notice any brush strokes after the second coat, you can lightly sand the surface with fine-grit sandpaper, though this step is optional.
Once your final coat is completely dry (usually 24 hours), protect your work by applying a clear wax or sealer. Use a lint-free cloth or wax brush to apply the protective coating in circular motions, working in small sections. The wax not only protects the paint but also deepens the color and creates a beautiful, lasting finish.
For a more distressed look, you can strategically sand edges and corners after the paint has dried but before applying wax. This technique creates an authentic vintage appearance that’s particularly popular in farmhouse and shabby chic styles.
Remember to work in a well-ventilated area and consider using a paint respirator, especially when working with sealing products. While chalk paint is generally low-VOC, it’s always better to err on the side of caution when it comes to safety.
Finishing Touches
Now that you’ve restored your furniture, it’s time to protect your hard work and ensure its longevity. Start by thoroughly cleaning the surface with a lint-free cloth to remove any dust or residue from the restoration process. Once clean, apply a protective finish that suits your piece’s intended use and location.
For everyday furniture, a clear polyurethane coating offers excellent protection against water, scratches, and daily wear. Apply thin, even coats using a high-quality foam brush, allowing each layer to dry completely before adding the next. Most pieces benefit from 2-3 coats for optimal protection.
If you’re working with antique or valuable pieces, consider using traditional furniture wax. Apply the wax in circular motions using a soft cloth, then buff it to achieve a beautiful, subtle sheen. Wax provides a more natural look but requires periodic reapplication every 6-12 months.
For pieces that will see heavy use, like dining tables or kitchen furniture, opt for a water-resistant polyacrylic finish. These modern finishes are incredibly durable and won’t yellow over time like traditional polyurethane can.
Remember to work in a well-ventilated area when applying any finish, and always follow the manufacturer’s instructions for drying times and application methods. After the final coat has fully cured (typically 24-48 hours), you can add protective felt pads to the bottom of your furniture to prevent scratching floors.
Store any leftover finish properly for touch-ups, and make a note of the product used for future reference. With proper protection, your restored piece should maintain its beauty for years to come.
Restoring wood furniture doesn’t have to be a daunting task, and as we’ve explored, there are numerous effective methods that don’t require sanding. Whether you choose liquid deglosser, chemical strippers, or natural alternatives like vinegar solutions, these techniques can breathe new life into your cherished pieces while saving time and effort. Remember to always test your chosen method on a small, hidden area first and work in a well-ventilated space. These restoration techniques are perfect for beginner-friendly DIY projects and can help you maintain the beauty of your wooden furniture for years to come. With the right products, proper preparation, and a bit of patience, you can achieve professional-looking results without the mess and hassle of traditional sanding. So go ahead, pick your preferred method, gather your supplies, and start transforming those tired pieces into stunning furniture that will enhance your home’s decor.