These Affordable Home Upgrades Pay For Themselves
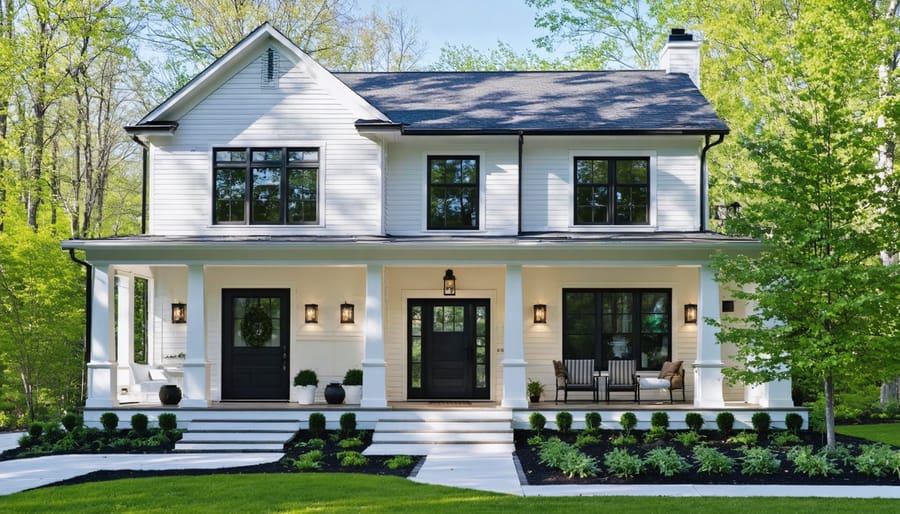
Transform your home’s value with strategic DIY upgrades that deliver substantial returns without breaking the bank. Paint your kitchen cabinets with high-quality semi-gloss enamel, install modern hardware, and instantly modernize your most valuable room for under $200. Replace outdated bathroom fixtures, add frame-less mirrors, and update lighting to create a spa-like atmosphere that appeals to future buyers. Boost curb appeal dramatically by installing landscape lighting, refreshing your front door with a bold color, and adding architectural details like window boxes or shutters.
These high-impact improvements require minimal expertise but consistently rank among real estate agents’ top recommendations for maximizing home value. Most projects can be completed in a weekend, using basic tools and materials from any home improvement store. Focus on updates that enhance both functionality and aesthetic appeal – the winning combination that attracts buyers and increases property values in any market.
Kitchen Transformations That Buyers Love
Cabinet Refresh Without Replacement
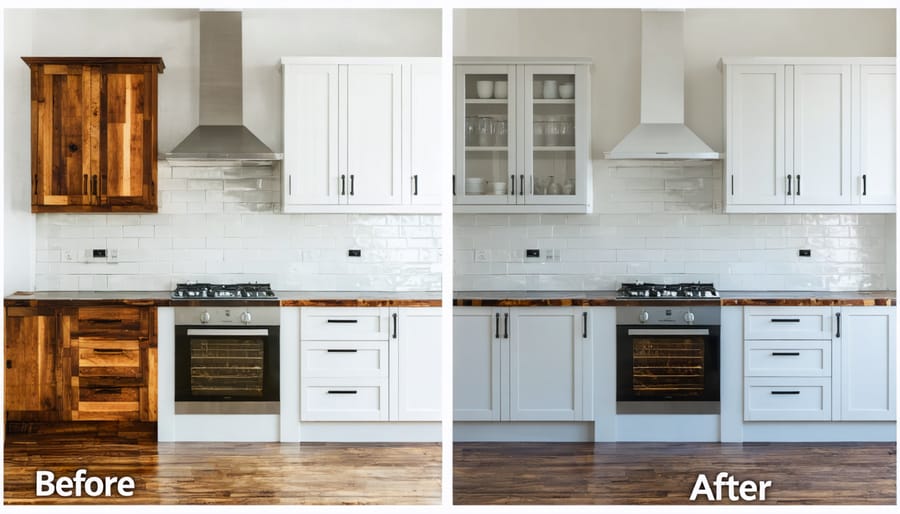
Transform your kitchen’s appearance without the hefty price tag of a full cabinet replacement. One of the most impactful ways to restore and refresh your cabinets is through a professional paint job and updated hardware.
Start by thoroughly cleaning all cabinet surfaces with a degreaser and lightly sanding them to ensure proper paint adhesion. Remove all hardware and doors, labeling each piece for easy reassembly. Choose a high-quality cabinet paint – either oil-based or specialized acrylic formulas work best. Apply a primer designed for cabinets, followed by at least two coats of paint, using a foam roller for smooth surfaces and an angled brush for details.
While the paint dries, focus on hardware updates. Modern pulls and handles can dramatically change your cabinet’s look – consider trending finishes like matte black, brushed gold, or satin nickel. Don’t forget to measure carefully before purchasing new hardware to ensure the screw holes align properly.
For added value, consider installing soft-close hinges and drawer slides. These small upgrades make a big impression on potential buyers and improve daily functionality. Finally, protect your refreshed cabinets with a clear topcoat to ensure longevity and durability.
This project typically costs between $200-500 for materials and can be completed over a weekend, potentially adding thousands to your home’s value.

Budget-Friendly Backsplash Solutions
A stunning backsplash can transform your kitchen without breaking the bank. Today’s market offers numerous affordable options that rival the look of high-end materials. Peel-and-stick tiles have evolved significantly, now featuring realistic stone, marble, and ceramic patterns that can be installed in a single afternoon. These removable options are perfect for renters or homeowners who like to update their style frequently.
For a more permanent solution, consider luxury vinyl tiles or smart ceramic options that mimic premium materials at a fraction of the cost. Modern vinyl tiles are water-resistant and can be installed directly over existing tile, saving both time and demolition costs. Another trendy option is paintable wallpaper with textured patterns that create the illusion of dimensional tile work.
DIY-friendly glass tile sheets offer a sleek, contemporary look and typically cost 30-40% less than professional installation. For the crafty homeowner, pressed tin panels provide vintage charm and can be painted to match any color scheme. Even basic ceramic subway tiles, when arranged in creative patterns like herringbone or basket weave, deliver high-end appeal without the premium price tag.
Before installation, ensure your wall surface is clean, dry, and level. Most backsplash projects can be completed over a weekend, making them perfect for busy homeowners. Remember to seal grout lines properly to protect against water damage and maintain the backsplash’s fresh appearance for years to come.
Bathroom Updates That Make a Big Impact
Modern Fixture Swaps
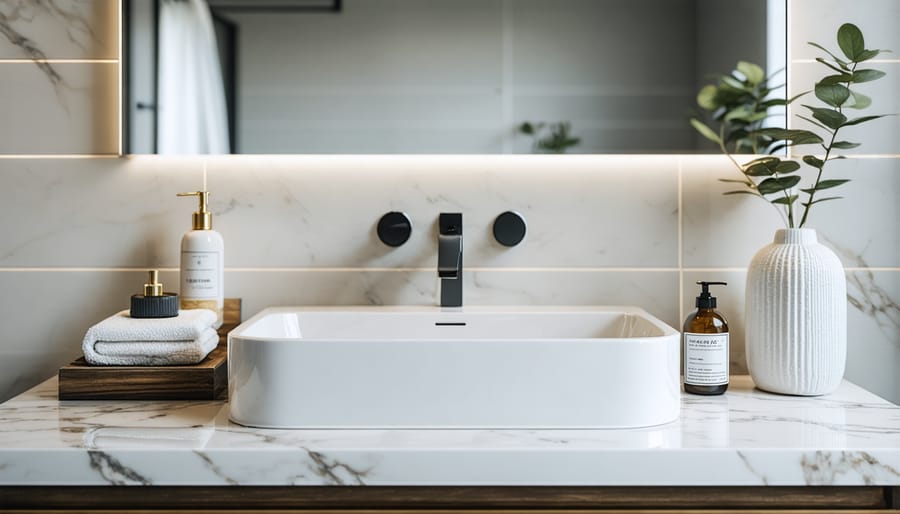
One of the most impactful yet straightforward upgrades you can make to your home is swapping out dated fixtures and hardware. This high-ROI project can transform the look of any room in just a few hours. Start with your kitchen and bathroom faucets – modern brushed nickel or matte black options can instantly elevate these spaces. When selecting new fixtures, opt for water-efficient models to add both style and functionality.
Door hardware is another quick win. Replace old brass doorknobs with contemporary lever handles or sleek electronic keypads. Don’t forget cabinet hardware – switching out dated pulls and knobs for modern alternatives can give your kitchen or bathroom cabinetry a fresh, updated look without a complete renovation.
Light fixtures are perhaps the most noticeable swap you can make. Replace builder-grade ceiling lights with modern pendants or statement chandeliers. In bathrooms, swapping out dated vanity lights for contemporary sconces can dramatically improve the space’s ambiance. Consider installing dimmer switches while you’re at it for added functionality and mood lighting options.
For the best results, maintain consistency in finishes throughout each room. While mixing metals has become trendy, keeping all fixtures in the same finish within a single space creates a more cohesive, upscale appearance. Remember to save your old fixtures – you can either sell them or reinstall them if you move.

Vanity and Storage Solutions
Transform your bathroom’s functionality and appearance by updating your vanity and implementing smart storage solutions. A new vanity can instantly modernize your space while providing better organization options. Consider installing a floating vanity to create the illusion of more floor space, or opt for a double-sink model to increase functionality for busy households.
For maximum impact, choose vanities with built-in organizational features like drawer dividers and pull-out shelves. Modern vanities often include convenient features such as soft-close drawers and built-in electrical outlets for grooming appliances. When selecting materials, quartz and granite countertops offer excellent durability and appeal to future buyers.
Storage solutions don’t stop at the vanity. Install recessed medicine cabinets to maximize wall space, or add over-toilet storage units for additional vertical organization. Consider installing built-in niches in shower walls during renovation projects – they’re perfect for toiletries and add a custom touch that buyers love.
For smaller bathrooms, try adding towel ladders or decorative hooks for both storage and style. Under-sink organizers can transform cluttered cabinet space into efficient storage zones. Don’t forget about unused corner spaces – corner shelving units or custom-built corner cabinets can provide surprising amounts of storage while maintaining a clean, organized appearance.
These improvements typically offer a strong return on investment, especially in markets where bathroom storage is at a premium. Plus, most of these projects can be completed over a weekend with basic DIY skills.
Energy-Efficient Upgrades
Smart Thermostat Installation
Installing a smart thermostat is a fantastic way to improve energy efficiency and add modern convenience to your home. Here’s how to tackle this project in about an hour:
First, turn off power to your HVAC system at the circuit breaker. Remove your old thermostat’s faceplate and take a photo of the existing wire connections – you’ll thank yourself later! Label each wire using the included stickers from your smart thermostat kit.
Disconnect and remove the old mounting plate, then install the new one that came with your smart thermostat. Connect the labeled wires to their corresponding terminals on the new base plate. Most smart thermostats use a common (C-wire) for power – if you don’t have one, many kits include an adapter.
Attach the display unit to the base plate and restore power. Follow the on-screen setup instructions to connect to your Wi-Fi network. Most models will guide you through basic programming, including schedule setup and temperature preferences.
Test your new thermostat by adjusting the temperature and ensuring your heating and cooling systems respond correctly. Download the companion app to control your home’s climate from anywhere, set energy-saving schedules, and monitor usage patterns.
LED Lighting Conversion
Upgrading your home’s lighting to LED technology is one of the smartest and most straightforward improvements you can make. Not only does this project deliver immediate energy savings, but it also adds lasting value to your home through improved efficiency and modern appeal.
Start by identifying all your current light fixtures and bulbs. Traditional incandescent and CFL bulbs can be easily replaced with LED equivalents that match your existing fixtures. Pay attention to the color temperature when selecting LEDs – warm white (2700-3000K) works best for living spaces, while cooler whites (3500-4000K) are ideal for task areas like kitchens and home offices.
Consider installing dimmer switches compatible with LED bulbs to enhance ambiance and further reduce energy consumption. Smart LED bulbs that connect to your home automation system are another excellent upgrade, offering convenience and additional energy management features.
The initial investment in LED lighting typically pays for itself within 1-2 years through reduced energy bills. LED bulbs last up to 25 times longer than traditional bulbs and use about 75% less energy, making them an attractive feature for potential buyers. Plus, the project requires minimal tools and can usually be completed in a single afternoon, making it perfect for DIY enthusiasts of any skill level.
Curb Appeal Quick Wins
Front Door Makeover
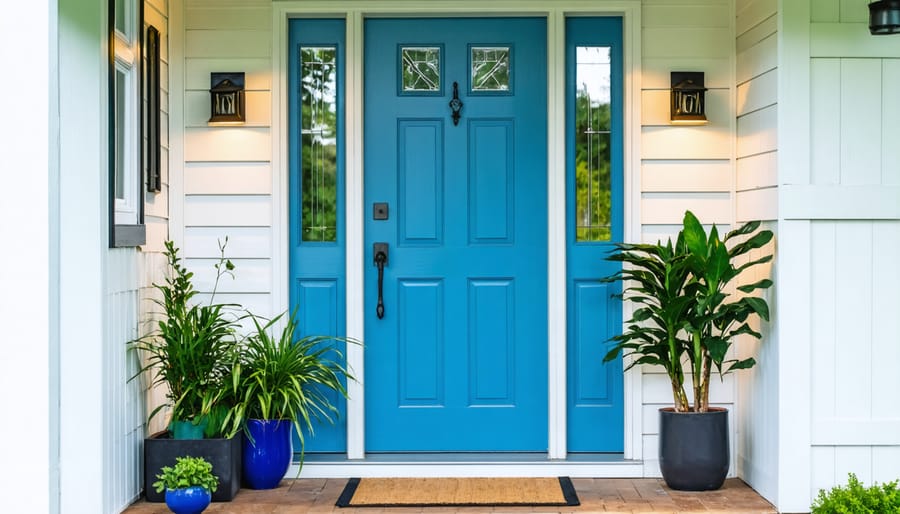
Your front door makes a powerful first impression and can significantly boost your home’s curb appeal. Best of all, giving it a makeover is a weekend project that delivers impressive returns on investment. Start by thoroughly cleaning the door and removing all hardware. If your door is wooden, sand any rough spots and repair minor damage with wood filler.
Choose a bold, weather-resistant exterior paint that complements your home’s color scheme. Dark blues, rich reds, and classic blacks are popular choices that make a statement while maintaining broad appeal. Apply two to three thin coats, allowing proper drying time between each application.
While the paint dries, upgrade your door hardware. A new handleset with matching hinges can instantly modernize your entrance. Opt for quality materials like brass, bronze, or satin nickel that resist tarnishing and wear. Don’t forget coordinating accessories like a door knocker, mail slot, or house numbers to complete the look.
Consider adding a protective storm door or updating weatherstripping to improve energy efficiency. Install a smart doorbell or keyless entry system to bring your entrance into the modern age. These tech upgrades not only enhance security but also appeal to future buyers.
Finally, frame your refreshed entrance with potted plants or new lighting fixtures to create an inviting entryway that welcomes both guests and potential buyers.

Landscape Lighting Installation
Transform your outdoor space and boost your home’s curb appeal with strategically placed landscape lighting. This DIY-friendly project not only enhances safety but also creates a warm, inviting atmosphere that makes your property stand out after dark.
Start by planning your lighting layout, focusing on key areas like walkways, entrances, and architectural features. Solar-powered lights offer the easiest installation, requiring no electrical work, while low-voltage systems provide more reliable illumination and can be installed with basic tools.
For a professional look, layer your lighting using different techniques. Install path lights along walkways at 6-8 foot intervals, use uplights to highlight trees or architectural elements, and consider adding accent lights to illuminate garden features or outdoor living spaces.
Most landscape lighting kits come with everything needed for installation, including cables, transformers, and fixtures. Begin by positioning your transformer near an outdoor outlet, then lay out your cable path. Secure fixtures in place, connect them to the main cable using the provided connectors, and bury the cable about 6 inches deep.
Pro tip: Choose warm white LED lights for energy efficiency and longevity. Consider adding a timer or smart controls to automate operation and reduce energy consumption. For best results, test your lighting layout at night before final installation to ensure proper coverage and avoid unwanted glare.
This weekend project typically costs between $200-500 for a basic setup and can increase your home’s value by improving both safety and aesthetics.
Paint Projects That Transform Spaces
A fresh coat of paint remains one of the most cost-effective ways to transform your living spaces and boost property value. Start with your front door – a bold color statement here creates instant curb appeal and sets the tone for your entire home. Consider trending colors like deep navy, forest green, or classic black for maximum impact.
Inside, focus on high-traffic areas first. Kitchen cabinets can be completely renewed with proper preparation and quality paint, turning dated wood into modern masterpieces. Choose neutral tones like warm greige or soft white for broader appeal. For walls, light colors make rooms feel larger and more inviting, while strategic accent walls add personality without overwhelming the space.
Don’t overlook trim and molding – refreshing these details in crisp white can instantly elevate any room’s appearance. In bathrooms, updating vanity cabinets with moisture-resistant paint provides a budget-friendly alternative to replacement. Remember to use appropriate primers and paint finishes for each surface – semi-gloss for trim, eggshell for walls, and specialized cabinet paint for kitchen and bath furniture.
For best results, invest in quality brushes, rollers, and painter’s tape. Take time to properly prep surfaces by cleaning, sanding, and filling holes. Small details like removing switch plates and using drop cloths will ensure professional-looking results that potential buyers will notice and appreciate.
Transforming your home doesn’t have to be overwhelming or expensive. From refreshing your kitchen cabinets with a new coat of paint to updating bathroom fixtures or adding smart home features, these simple improvements can significantly boost your property’s value. The key is to focus on projects that offer the best return on investment while matching your skill level and budget. Whether you start with curb appeal enhancements like landscaping and exterior painting, or tackle interior updates like lighting fixtures and flooring, each project brings you closer to a more valuable home. Remember, even small changes can make a big difference when done thoughtfully and with quality materials. Start with one project that excites you, and you’ll be amazed at how these manageable improvements transform your living space while building equity in your home.
