")
Transform Your Bathroom Walls from Boring to Beautiful (Without Breaking the Bank)
Transform your bathroom walls from basic to breathtaking with treatments that combine style and functionality. From luxurious marble-effect panels to budget-friendly DIY wallpaper solutions, modern wall treatments offer endless possibilities to create a spa-like sanctuary or a bold personal statement. Whether you’re dealing with moisture concerns in a small powder room or reimagining a master bath, today’s innovative materials and techniques provide durable, water-resistant options that protect while they beautify. Beyond traditional tile, consider dramatic solutions like waterproof vinyl wallcoverings, textured paint techniques, or sleek acrylic panels that deliver high-end aesthetics without compromising practical needs. Discover how strategic wall treatments can visually expand your space, introduce character, and elevate your bathroom’s design while maintaining the perfect balance between beauty and practicality.
Modern Wall Treatment Options That Defy Convention
Waterproof Wallpaper and Murals
Transform your bathroom walls with modern wall covering ideas specifically designed for high-moisture environments. Today’s waterproof wallpapers offer stunning designs while providing excellent protection against humidity and splashes. These innovative materials feature vinyl coating or specialized moisture-resistant treatments that prevent mold and mildew growth.
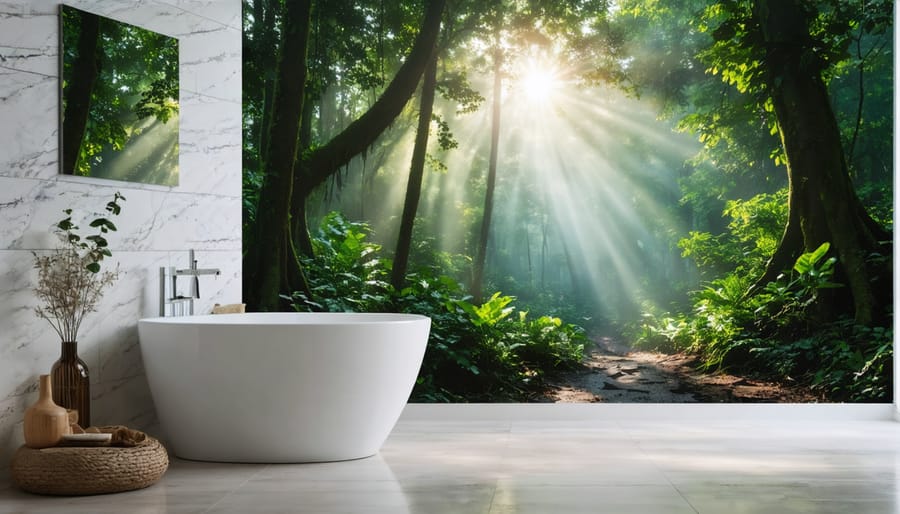
Large-scale murals have become increasingly popular, creating dramatic focal points that can make your bathroom feel like a spa retreat. From tropical landscapes to abstract patterns, these moisture-resistant murals are printed on durable materials that withstand daily bathroom use. Installation is straightforward – most options come with peel-and-stick backing or traditional paste application methods.
For best results, choose wallpapers labeled specifically for bathroom use, and consider adding a clear waterproof sealant for extra protection in shower-adjacent areas. Remember to properly prep your walls by addressing any existing moisture issues and using mold-resistant primer before installation. This ensures your new wall treatment remains beautiful and functional for years to come.
Textured Wall Panels
Transform your bathroom into a visual masterpiece with textured wall panels that add depth and sophistication to your space. These three-dimensional surfaces create stunning visual effects while offering practical benefits like moisture resistance and easy maintenance. From geometric patterns to nature-inspired textures, modern smart wall systems make installation surprisingly straightforward.
Popular options include PVC panels that mimic natural stone, wood-textured composites that withstand humidity, and sleek metallic-finish boards that reflect light beautifully. For a bold statement, consider wave patterns or hexagonal designs that create an eye-catching focal point. These panels typically come in easy-to-install sections that click together or adhere directly to your existing wall surface.
Beyond aesthetics, textured panels can help mask wall imperfections and provide additional insulation. They’re particularly effective in shower areas where traditional tiles might be prone to grout issues. Many modern panels also feature antimicrobial properties, making them ideal for bathroom environments where cleanliness is paramount. Choose from a range of colors and finishes to complement your existing décor while adding that extra dimension your bathroom needs.
Smart Solutions for Small Bathrooms
Vertical Design Elements
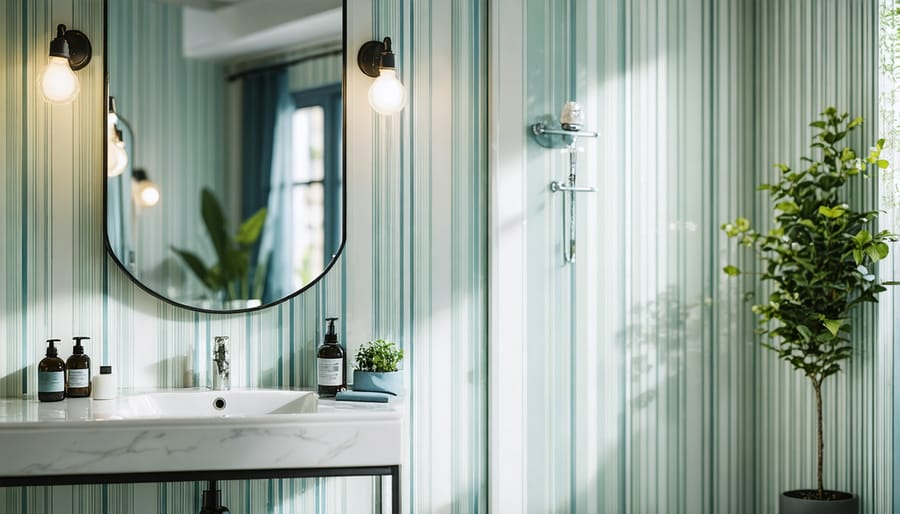
Vertical design elements can dramatically transform your bathroom by creating an illusion of higher ceilings and added depth. One popular approach is using vertical subway tiles arranged in a column pattern, drawing the eye upward and making the space feel taller. For a bold statement, consider installing floor-to-ceiling wallpaper with vertical stripes or patterns that emphasize height.
Adding tall, narrow mirrors is another effective technique that not only creates depth but also bounces light throughout the room. Consider installing a series of vertical sconces alongside these mirrors to enhance the elongating effect while providing functional lighting.
Natural elements can also contribute to vertical interest. Try mounting hanging plants at different heights or installing a vertical garden wall using moisture-loving plants. These living elements add texture and create visual movement upward.
For a modern touch, consider vertical panel molding painted in a contrasting color to your wall base. This architectural detail can be installed from floor to ceiling, creating clean lines that naturally direct the eye upward. If you’re working with a smaller bathroom, vertical shiplap or board-and-batten treatments in light colors can make the space feel more expansive while maintaining visual interest.
Remember to balance these vertical elements with horizontal features to prevent the space from feeling too narrow or stretched.
Mirror and Glass Treatments
Mirrors and glass elements can dramatically transform your bathroom, creating an illusion of space while adding a touch of sophistication. Consider installing a floor-to-ceiling mirror wall to instantly double the perceived size of your bathroom and maximize natural light reflection. For a more artistic approach, try arranging multiple smaller mirrors in a geometric pattern or using antique-framed mirrors to create a vintage gallery wall effect.
Textured glass panels offer a modern alternative to traditional wall treatments, providing privacy while allowing light transmission. Consider frosted glass panels with etched designs or install glass tiles in varying opacities to create depth and visual interest. Backlit mirror installations combine functionality with ambient lighting, perfect for creating a spa-like atmosphere.
For a truly unique look, experiment with mirror mosaics using broken mirror pieces (safely handled and installed) or incorporate mirrored subway tiles for a contemporary twist on a classic design. To prevent moisture damage, ensure all mirror and glass installations are properly sealed and use moisture-resistant adhesives specifically designed for bathroom applications.
Don’t forget about maintenance – choose treatments that are easy to clean and won’t show water spots easily. Anti-fog mirrors and hydrophobic glass coatings can help maintain clarity and reduce cleaning frequency, making these reflective surfaces both beautiful and practical for daily use.
DIY-Friendly Wall Treatment Projects
Stenciling and Paint Techniques
Stenciling offers an affordable way to add personality to your bathroom walls through creative paint techniques. To get started, clean your walls thoroughly and apply a base coat in your chosen color. Once dry, secure your selected stencil pattern with painter’s tape, ensuring it’s level and properly aligned.
Using a foam roller or stencil brush, apply paint in thin, even layers to prevent bleeding under the stencil. Work from the outside edges inward, using a dabbing motion rather than sweeping strokes. For best results, remove the stencil while the paint is still slightly wet to avoid peeling.
Popular bathroom stencil patterns include geometric designs, botanical motifs, and Moroccan-inspired patterns. Consider using semi-gloss or satin finish paint for better moisture resistance and easier cleaning. For added interest, try metallic paints or combine multiple colors within your stencil design.
Other paint techniques to consider include color washing, which creates a soft, watercolor effect, or ombré fading from dark to light. For texture, try ragging or sponging techniques using glaze over your base color. These methods add depth and visual interest while hiding minor wall imperfections.
Remember to work in small sections and maintain proper ventilation throughout the process. Allow adequate drying time between coats and seal your work with a moisture-resistant clear coat for longevity in the bathroom environment. Keep your stencils clean between uses, and store them flat to maintain their shape for future projects.
Easy-Install Wall Panels
Transform your bathroom walls with minimal effort using peel-and-stick and clip-on panels. These innovative solutions offer a quick, mess-free way to achieve a high-end look without extensive renovation work.
Peel-and-stick panels are the ultimate DIY-friendly option. Start by cleaning your walls thoroughly and ensuring they’re completely dry. Measure your space carefully and cut panels to size before removing the backing. Work from top to bottom, smoothing out air bubbles as you go. For best results, use a squeegee or plastic card to press firmly, especially around edges and corners.
Clip-on panels provide another hassle-free alternative. These systems typically include a mounting track that attaches to your wall, allowing panels to snap securely into place. Installation usually requires basic tools like a level, drill, and screwdriver. Most clip-on panels can be removed and replaced easily, making them perfect for rental properties or frequent style updates.
Both options come in various designs, from sleek modern patterns to classic tile looks. Popular choices include faux marble, wood grain, and geometric designs. When selecting panels, consider moisture resistance ratings and ensure they’re specifically designed for bathroom use.
Pro tip: Order extra panels to account for mistakes and future repairs. For areas around plumbing fixtures, create paper templates first to ensure precise cuts. If you’re installing in a shower area, apply additional silicone sealant along edges for extra water protection.
Remember to maintain proper ventilation in your bathroom to extend the life of your panels and prevent moisture-related issues.
Maintenance and Durability Considerations
Moisture-Resistant Options
When it comes to bathroom walls, moisture resistance is crucial for longevity and maintenance. PVC wall panels offer excellent water resistance and come in various designs, including marble and stone effects. These panels are easy to install and clean, making them a practical choice for busy households.
Porcelain and ceramic tiles remain a classic choice, providing superior moisture protection while offering endless design possibilities. Modern large-format tiles minimize grout lines, reducing potential areas for mold growth. For a luxurious touch, glass tiles create a stunning waterproof surface that reflects light beautifully.
Vinyl wallpaper specifically designed for bathrooms provides another stylish option. Look for products labeled “moisture-resistant” or “bathroom-grade” to ensure they can withstand humid conditions. These wallpapers often feature mold-inhibiting properties and are available in countless patterns and textures.
For a more natural look, marine-grade plywood panels treated with waterproof sealants offer durability while maintaining a warm, organic feel. Another innovative option is acrylic wall panels, which provide seamless coverage and exceptional water resistance while mimicking materials like stone or metal.
Consider moisture-resistant paint with built-in mold inhibitors for a simple yet effective solution. Many manufacturers now offer specialized bathroom paint formulations that create a water-resistant barrier while allowing walls to breathe properly.
Cleaning and Care Tips
Proper maintenance of your bathroom wall treatments is crucial for their longevity and appearance. For painted walls, regularly wipe them down with a mild cleaning solution and soft cloth to prevent mold and mildew buildup. Avoid abrasive cleaners that could damage the finish, and address any water spots immediately.
If you have wallpaper, use a damp cloth for regular cleaning and avoid excessive moisture. For stubborn stains, test any cleaning products on a small, inconspicuous area first. Keep the bathroom well-ventilated to prevent wallpaper peeling and ensure any loose edges are promptly resealed.
Tile walls require attention to both the tiles and grout lines. Clean regularly with a pH-neutral cleaner, and seal grout lines annually to prevent water penetration. For natural stone tiles, use only stone-specific cleaners to protect the material’s integrity.
PVC panels and acrylic wall treatments can be maintained with standard bathroom cleaners, but avoid anything containing harsh chemicals or abrasives. A microfiber cloth works best for these surfaces.
For textured walls or specialty finishes, dust regularly with a soft brush attachment on your vacuum cleaner. Address any chips or damage promptly to prevent moisture from compromising the wall treatment.
Remember to run your bathroom fan during and after showers to reduce moisture levels and extend the life of your wall treatments.
Transform your bathroom from ordinary to extraordinary with these versatile wall treatment options. Whether you’re drawn to the timeless elegance of tile, the warmth of wood panels, or the modern appeal of decorative wallpaper, there’s a perfect solution for every style and budget. Remember to consider your bathroom’s specific needs, including moisture levels and ventilation, when selecting materials. Don’t be afraid to mix and match different treatments or start small with an accent wall. With proper planning and installation, your new bathroom walls can create a stunning sanctuary that combines both beauty and functionality. Take the first step today in reimagining your bathroom space – the perfect wall treatment awaits to bring your vision to life.