")
Transform Your Home’s Exterior with LED Strip Lights (No Pro Required)
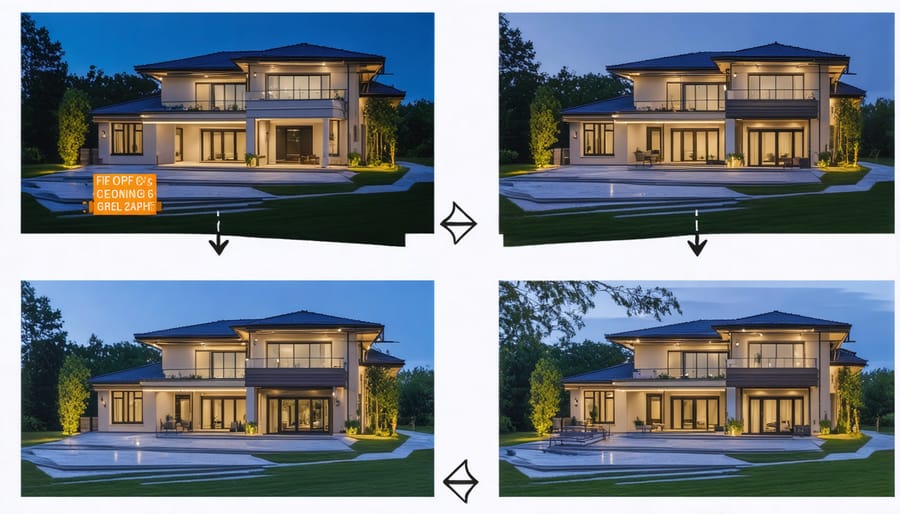
Transform your home’s exterior with LED strip lights – a modern upgrade that combines energy efficiency with stunning visual impact. Installing outdoor LED strips requires careful planning and the right tools, but delivers professional-quality smart lighting design that enhances curb appeal while reducing energy costs. Whether highlighting architectural features, illuminating pathways, or creating ambient outdoor lighting, this project can be completed in a weekend with basic DIY skills.
Before starting, measure your installation areas carefully, choose weather-rated LED strips with appropriate brightness (measured in lumens), and gather essential supplies including weatherproof connectors, mounting clips, and a power supply rated for outdoor use. Consider smart controllers for automated operation and color changing capabilities, allowing seamless integration with existing home automation systems.
This guide walks you through proper installation techniques, ensuring your LED strips remain secure and protected from the elements while creating the perfect lighting ambiance for your home’s exterior. Follow our step-by-step instructions to achieve professional results that will illuminate your property for years to come.
Essential Tools and Materials
Choosing the Right LED Strips
When it comes to DIY lighting solutions, selecting the right LED strips for your home’s exterior is crucial. Look for strips rated IP65 or higher for proper weather resistance – this ensures they’ll withstand rain, snow, and humidity. For optimal visibility, choose strips with at least 120 LEDs per meter and a brightness level between 800 and 1200 lumens.
Consider your color preferences carefully. While RGB strips offer flexibility with multiple color options, pure white (available in warm or cool tones) often provides the most sophisticated look for home exteriors. If you’re planning to integrate your lights with a smart home system, ensure the strips are compatible with your preferred platform, whether it’s Alexa, Google Home, or Apple HomeKit.
Pay attention to the strip’s voltage requirements – 12V or 24V options are standard for outdoor use. Also, check the LED strip’s beam angle; wider angles (120-140 degrees) provide better spread for architectural lighting, while narrower beams work well for focused accent lighting. Remember to factor in the length of continuous runs you’ll need, as voltage drop can affect brightness over long distances.
Required Tools Checklist
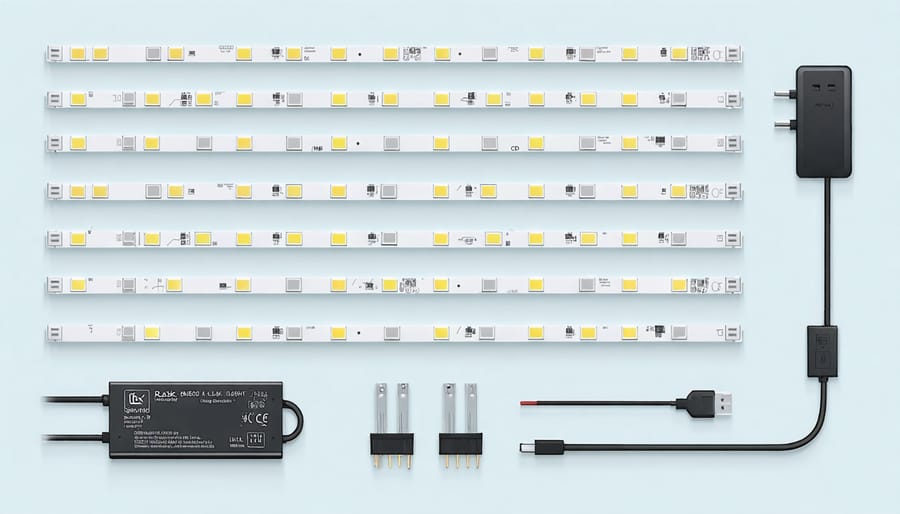
Before starting your LED strip light installation, gather these essential tools and safety equipment:
• Measuring tape and pencil
• Wire strippers and cutters
• Scissors (specifically for cutting LED strips)
• Electric drill with drill bits
• Silicone sealant and caulking gun
• Ladder or scaffolding
• Level tool
• Clean rags
• Screwdrivers (Phillips and flathead)
• Outdoor-rated mounting clips
• Cable management clips
• Voltage tester
• Work gloves
• Safety glasses
• Weather-resistant electrical tape
• Wire connectors
• Power supply unit(s)
• Optional: Cable conduit for wire protection
Safety tip: Always ensure your ladder is stable and have someone spot you while working at heights. Double-check that all electrical tools are in good working condition before starting the project.
Planning Your Installation
Measuring and Mapping
Before diving into installation, accurate measurements and planning are crucial for creating stunning custom lighting features. Start by measuring the entire perimeter where you plan to install the LED strips. Use a flexible measuring tape for precise readings, especially around corners and architectural features. Make a rough sketch of your house’s exterior, marking important elements like windows, doors, and existing electrical outlets.
Note the total linear feet needed and add an extra 10% for any miscalculations or adjustments. When mapping your installation route, consider natural breaking points where strips might need to be cut and connected. Mark potential power source locations, ensuring they’re within reach of your LED strips’ power requirements.
Plan your strip placement to maximize visual impact while maintaining a clean, professional look. Consider factors like roof overhangs, which can provide natural protection for your LED strips. Document all measurements and power source locations in your sketch – this will serve as your blueprint during installation and make the process much smoother.
Power Source Planning
Before installing your LED strip lights, it’s crucial to plan your power setup carefully. Start by calculating the total wattage needed for your installation by multiplying the watts per foot of your LED strips by the total length you plan to install. Most residential LED strips use between 2 to 4.5 watts per foot, so a 50-foot installation might require between 100 to 225 watts.
Choose a power supply that can handle at least 20% more than your calculated needs to ensure stable performance. For example, if your calculation shows 200 watts, opt for a 240-watt power supply or higher. Consider using multiple power supplies for long runs to prevent voltage drop, which can cause uneven brightness.
For outdoor installations, make sure to use weatherproof power supplies rated for exterior use. Place them in protected areas like under eaves or in waterproof enclosures. You’ll also need to identify accessible outdoor outlets or consider having a dedicated circuit installed by a licensed electrician.
Plan your power supply locations strategically to minimize visible wiring and ensure easy access for maintenance. Remember to check local building codes regarding outdoor electrical installations and weatherproofing requirements.
Step-by-Step Installation Process
Surface Preparation
Proper surface preparation is crucial for ensuring your LED strip lights stay securely mounted. Start by thoroughly cleaning the intended mounting surface with isopropyl alcohol and a lint-free cloth to remove any dirt, dust, or grease. This step is especially important for outdoor installations where environmental elements can affect adhesion.
If you’re installing on brick, concrete, or rough surfaces, you may need to sand down any obvious bumps or irregularities. For metal surfaces, check for and remove any rust spots before proceeding. Allow all cleaned surfaces to dry completely before installation – typically 10-15 minutes is sufficient.
For areas exposed to extreme weather, consider using a primer specifically designed for LED strip mounting. Apply it thinly and evenly to the surface, letting it cure according to the manufacturer’s instructions. This extra step significantly improves adhesion and longevity.
Test the adhesion strength in a small, inconspicuous area first. If the surface is particularly challenging, you might need additional mounting brackets or clips for extra security.
Mounting Techniques
Proper mounting is crucial for ensuring your LED strip lights stay securely in place and function effectively. The most common and reliable method is using the adhesive backing that comes pre-installed on most LED strips. Before applying, clean the mounting surface thoroughly with rubbing alcohol and ensure it’s completely dry. Press the strip firmly against the surface for 30 seconds to create a strong bond.
For added security, especially in outdoor applications, consider using mounting clips or channels. These plastic or aluminum accessories provide extra protection and can help direct the light more effectively. Space the clips every 12-18 inches along the strip to prevent sagging.
If you’re installing on rough or uneven surfaces, silicone mounting brackets offer excellent grip and flexibility. These work particularly well on brick or textured siding. For temporary installations or surfaces where adhesive isn’t suitable, you can use cable ties or hook-and-loop fasteners, though these should be used sparingly and aren’t recommended for permanent outdoor installation.
For corners and edges, use corner connectors or cut the strip at designated points, following the manufacturer’s guidelines. When mounting around curves, avoid bending the strips too sharply as this can damage the internal connections. Instead, use multiple shorter straight sections connected with flexible joiners.
Remember to leave some slack in the strip near power connections to prevent strain on the wiring. If installing under eaves or overhangs, consider using aluminum channels with diffuser covers for a professional finish and added protection from the elements.
Wiring and Connections
Proper wiring is crucial for a safe and reliable LED strip light installation. Start by connecting your LED strips to the power supply using weatherproof connectors or junction boxes rated for outdoor use. If you’re connecting multiple strips, use waterproof snap connectors or solder the connections and seal them with heat shrink tubing and silicone sealant.
For power distribution, use 18-22 AWG outdoor-rated wires, ensuring they’re properly insulated and protected from the elements. When running wires, create drip loops to prevent water from following the cable into connections or fixtures. Mount all power supplies and controllers in weatherproof enclosures, positioning them in covered areas away from direct exposure to rain and snow.
If your installation requires splicing, use marine-grade wire connectors and wrap all connection points with self-fusing silicone tape followed by quality electrical tape. For added protection, apply a layer of UV-resistant clear silicone caulk over exposed connections.
Remember to maintain proper polarity throughout your connections – match the positive and negative terminals carefully. Consider installing a waterproof in-line fuse holder near the power supply for additional circuit protection. When routing wires, use outdoor-rated cable clips or conduit to secure them against walls and protect them from physical damage.
Test all connections thoroughly before final mounting, and consider installing a ground fault circuit interrupter (GFCI) outlet for added safety in wet conditions.
Control and Automation Options
Smart Controls Setup
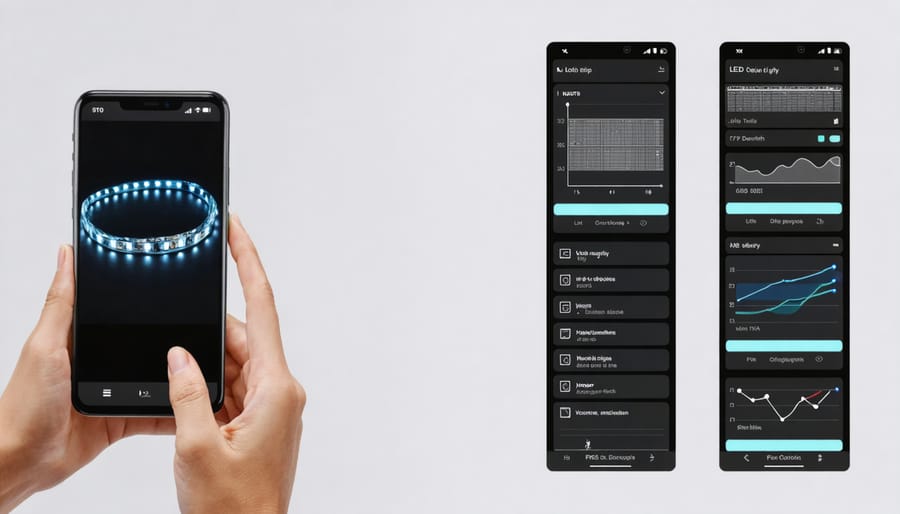
Modern LED strip lights often come with smart capabilities, making smart home integration a breeze. Start by downloading your LED strip’s companion app to your smartphone. Most popular brands like Philips Hue or LIFX have user-friendly apps available on both iOS and Android platforms.
Once downloaded, connect your LED strips to your home’s WiFi network through the app. Follow the in-app pairing instructions, which typically involve pressing a sync button on the controller or scanning a QR code. After establishing the connection, you can name different zones or sections of your outdoor lighting for easier control.
Set up automated schedules for your lights to turn on at sunset and off at sunrise, or create custom timing patterns. Many apps also allow you to sync your lights with music, create scenes for different occasions, or integrate with voice assistants like Alexa or Google Home for hands-free control.
Remember to test all automation features thoroughly before finalizing your setup, ensuring proper responsiveness and timing across all zones.
Programming Tips
Make the most of your LED strip lights by creating custom schedules and scenes through your smart home app. Set your lights to gradually brighten in the morning or automatically turn on at sunset. Create different moods by programming color combinations – try warm whites for relaxation or vibrant colors for entertaining. Many apps allow you to save multiple scenes, like “Movie Night” or “Holiday Party,” for quick access. For enhanced security, schedule random patterns while you’re away to simulate occupancy. Remember to group your outdoor lights by zones for easier control and consider using motion sensors to trigger specific lighting sequences. Most smart LED controllers are compatible with voice assistants, letting you activate your favorite scenes hands-free.
Maintenance and Troubleshooting
To keep your LED strip lights functioning properly, regular maintenance and quick troubleshooting are essential. Clean the strips monthly using a soft, slightly damp cloth to remove dust and debris, being careful not to get water near electrical connections. Check all connections periodically for loose wires or signs of wear.
Common issues include flickering lights, which usually indicate a poor connection or voltage drop. If this occurs, verify all connections are secure and consider adding a power amplifier for longer runs. Sections not lighting up might mean a break in the strip – look for visible damage and repair or replace the affected segment.
For outdoor installations, inspect the weatherproof coating regularly for damage. If you notice any peeling or cracking, apply additional silicone sealant to maintain weather resistance. Replace any damaged diffusers promptly to protect the LEDs from moisture and debris.
If your smart-enabled strips become unresponsive, try resetting both the strips and your home automation hub. For persistent issues, consult your manufacturer’s troubleshooting guide or contact their support team for assistance.
Installing LED strip lights on your house is a rewarding DIY project that can transform your home’s appearance while adding functionality and value. By following the steps we’ve covered, you can create a professional-looking lighting installation that’s both beautiful and durable. Remember to carefully plan your layout, choose weather-appropriate materials, and take proper safety precautions during installation. Whether you’re lighting up your eaves, highlighting architectural features, or creating ambient outdoor lighting, the key is in the preparation and attention to detail. Don’t be afraid to start small and expand your lighting project over time. With the right tools, materials, and these guidelines, you’re well-equipped to enhance your home’s exterior with stunning LED strip lighting that you can enjoy for years to come.