Transform Your Workspace: DIY Desk Dividers That Actually Look Good
Transform your workspace instantly with DIY desk dividers that blend style and functionality. Create privacy screens using repurposed cabinet doors mounted on adjustable hinges, or craft modern acrylic panels decorated with frosted vinyl patterns to improve your home office aesthetics. Fashion portable dividers from lightweight materials like corrugated cardboard covered in fabric, perfect for temporary solutions that pack away easily. Build custom-sized partitions using wooden frames filled with sound-absorbing cork boards or pegboards for added utility.
These practical solutions transform open spaces into focused work zones without permanent modifications or expensive materials. Whether you’re adapting to a shared workspace or seeking visual boundaries in your home office, DIY desk dividers offer the perfect blend of personalization and practicality. Choose materials that complement your existing décor while maintaining sight lines and natural light flow, creating an environment that enhances both productivity and comfort.
Essential Materials and Tools for DIY Desk Dividers
Budget-Friendly Material Options
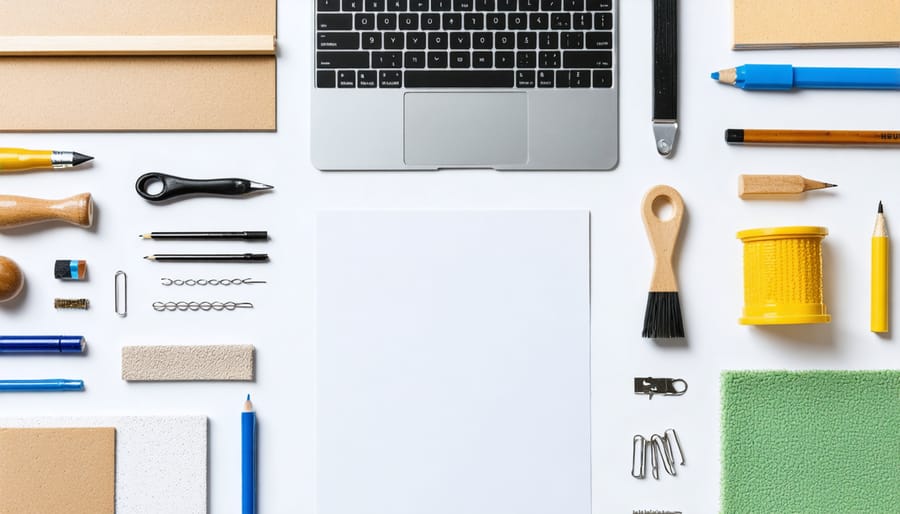
Creating stylish desk dividers doesn’t have to break the bank. When choosing DIY desk divider materials, several budget-friendly options can deliver impressive results. Cardboard is perhaps the most economical choice, especially when using recycled shipping boxes or packaging materials. With proper reinforcement and decoration, cardboard dividers can look surprisingly professional.
Fabric-covered foam board offers another affordable solution, allowing you to match your workspace’s color scheme while providing sound absorption benefits. Consider using remnant fabric pieces or repurposed textiles to keep costs down. Pegboard is an excellent multi-functional option that not only creates separation but also provides storage opportunities for office supplies and decorative items.
For a more modern look, lightweight acrylic sheets are relatively inexpensive when purchased in smaller sizes. While slightly pricier than cardboard or fabric options, acrylic offers durability and a clean, professional appearance that can elevate your workspace. Remember to check local hardware stores for off-cuts or remnant pieces, which often sell at discounted prices.
Tools You’ll Need
Before getting started with your DIY desk divider project, gather these essential tools to ensure smooth construction and installation:
Basic Tools:
– Measuring tape or ruler
– Pencil and paper for marking
– Level for proper alignment
– Scissors or utility knife
– Screwdriver (both Phillips and flathead)
– Power drill with various drill bits
– Safety glasses and work gloves
Optional but Helpful:
– Electric saw (if working with wood or acrylic)
– Staple gun (for fabric-covered options)
– Sandpaper (various grits)
– Clamps for holding materials in place
– Paint brushes or rollers (if finishing with paint)
– Hammer for light assembly work
Cleaning Supplies:
– Dust cloth or microfiber towel
– All-purpose cleaner
– Drop cloth to protect your workspace
Keep these tools organized in a nearby toolbox or tray while working. If you’re new to DIY projects, don’t worry about having every tool – start with the basics and add tools as needed for more complex designs. Remember to prioritize safety equipment, especially when cutting materials or using power tools.
Simple DIY Desk Divider Projects
The Modern Acrylic Divider
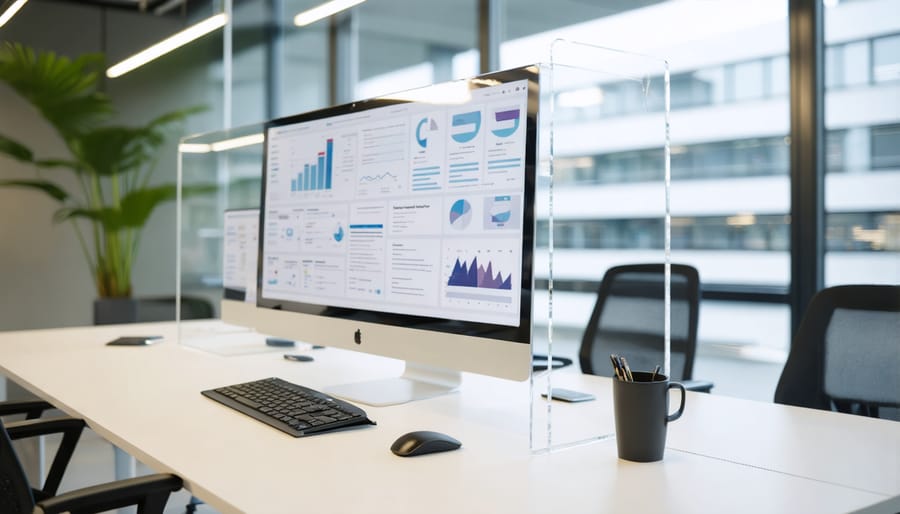
For a sophisticated and contemporary workspace solution, creating an acrylic divider offers a perfect blend of functionality and style. Taking inspiration from popular modern partition designs, this transparent barrier maintains an open feel while providing necessary separation.
Start by measuring your desk dimensions and purchase a sheet of clear acrylic from your local hardware store. For optimal stability, choose 1/4-inch thick acrylic. You’ll also need two L-brackets, screws, and rubber edge trim for a polished look.
Cut the acrylic to size using a scoring tool and straight edge. Make multiple passes with the scoring tool, then carefully snap along the score line. Sand the edges smooth with fine-grit sandpaper, working from rough to fine grits for the best finish.
Attach the rubber edge trim around the perimeter of your acrylic panel. This not only provides a finished look but also protects against sharp edges. Secure the L-brackets to your desk using screws, ensuring they’re perfectly aligned. Finally, slide your acrylic panel into the brackets and tighten the securing screws.
For added personalization, consider using frosted spray paint to create partial opacity or adding decorative vinyl decals. Clean your finished divider with specialized acrylic cleaner to maintain its crystal-clear appearance.
Fabric-Covered Panel Divider
Create a professional-looking, sound-dampening divider by starting with a lightweight wooden frame made from 1×2 lumber. Cut four pieces to your desired height and width, forming a rectangle, and secure the corners with wood glue and screws. For added stability, add a center support beam.
Cover both sides of the frame with thick batting material, securing it with a staple gun. This creates the soft, cushioned base for your fabric. Choose a durable, attractive fabric that complements your workspace – consider using acoustic fabric for enhanced sound absorption.
Cut your chosen fabric about 2 inches larger than the frame on all sides. Starting from the center of one side, pull the fabric taut and staple it to the frame’s edge. Work your way outward, alternating sides like you’re wrapping a present, to ensure even tension. Create clean corners by folding them like hospital corners on a bed.
For extra stability, attach small L-brackets to the bottom of your frame. These can be screwed into your desk for a permanent solution, or left unattached for flexibility. To maintain the clean look, cover the brackets with coordinating fabric.
This divider not only creates privacy but also helps reduce noise and adds a touch of sophistication to your workspace. The fabric can be changed out whenever you want to update your office aesthetic.
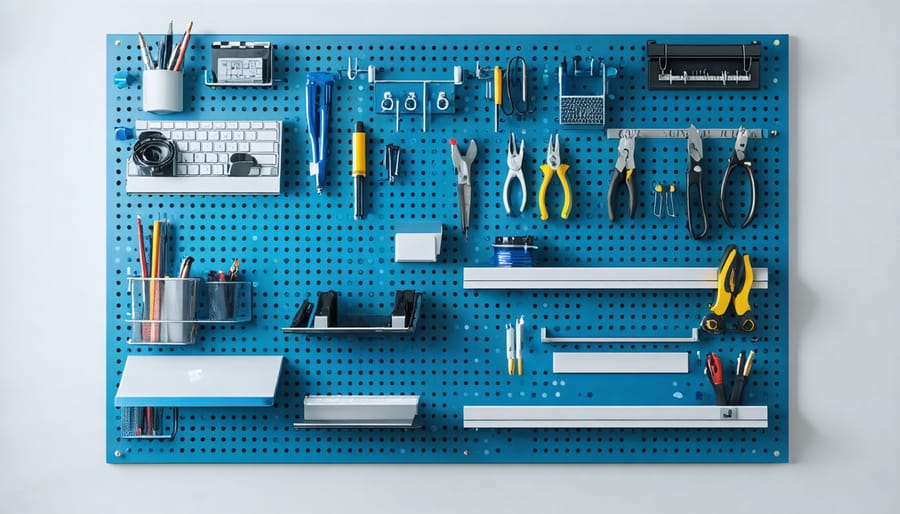
Pegboard Organization Divider
A pegboard divider offers the perfect blend of separation and storage for your workspace. This versatile solution not only creates distinct work zones but also provides customizable storage options that can evolve with your needs.
To create your pegboard divider, start with a pegboard panel cut to your desired height and width. Sand the edges smooth and prime both sides to prevent warping. For stability, frame the pegboard with 1×2 wooden strips along all edges, creating a sturdy border that will also serve as your mounting structure.
Create a solid base by attaching two L-brackets to a wooden block that’s slightly wider than your pegboard frame. This base will keep your divider upright without permanent installation. Secure the pegboard frame to the base using wood screws, ensuring it’s perfectly vertical.
The real magic happens with accessories. Add pegboard hooks, baskets, and shelves to maximize vertical storage. Consider incorporating:
– Small containers for office supplies
– File holders for documents
– Hook combinations for headphones and cables
– Mini shelves for decorative items
Paint your pegboard in a color that complements your workspace. For added functionality, install the same organization system on both sides, effectively doubling your storage capacity while maintaining a clean, professional appearance.
This project typically takes about two hours to complete and can be easily customized to fit any desk size or office layout.
Natural Wood Panel Divider
For a sophisticated yet rustic approach to desk division, consider creating a natural wood panel divider. Start by selecting three matching wood panels, roughly 24 inches wide by 18 inches tall each. Cedar or pine works beautifully for this project, offering both durability and visual appeal. Sand each panel thoroughly, starting with 80-grit sandpaper and working your way up to 220-grit for a smooth finish.
Connect the panels using decorative brass hinges, placing two hinges between each panel. Position them about 4 inches from the top and bottom edges. Pre-drill your holes to prevent splitting, and secure the hinges with wood screws. This creates a foldable design that’s both stable and adjustable.
For added stability, attach small rubber feet to the bottom edges of the outer panels. This prevents scratching your desk surface and keeps the divider firmly in place. Consider finishing your divider with a natural wood stain or clear polyurethane to protect the wood while maintaining its organic beauty.
Personalize your divider by adding functional elements like small hooks for hanging notes or a cork strip for pinning documents. For extra stability in open-office settings, you can also add small L-brackets at the base, which can be easily screwed into your desk surface if desired.
This natural wood panel divider not only creates privacy but also adds a warm, organic element to your workspace that complements any office décor.
Installation and Mounting Options
Temporary Solutions
For renters and those seeking non-permanent solutions, there are several clever ways to create desk dividers without damaging your workspace. Command strips and hooks offer excellent temporary mounting options, supporting lightweight divider materials like foam board or corrugated plastic. These adhesive solutions leave no residue when removed and can hold surprising weight when properly installed.
Another renter-friendly approach is using C-clamps or desk-mounted brackets that grip the edge of your desk. These provide sturdy support for acrylic or plexiglass panels without requiring any drilling. Simply adjust the clamp’s width to match your desk thickness, and you’re set.
Weighted bases offer another smart solution. Create stable stands using decorative planters filled with sand or stones, then insert your divider panel. This method works particularly well with lightweight materials like bamboo screens or fabric panels.
For a truly temporary option, consider using folding screens or accordion-style dividers that can stand independently on your desk. These can be easily removed and stored when not needed, making them perfect for flexible workspace arrangements.
Permanent Installation
For a permanent desk divider solution, you’ll want to focus on secure mounting methods that ensure stability and longevity. Start by measuring and marking your mounting points on both the desk surface and the divider panel. Using L-brackets is one of the most reliable approaches – install them at regular intervals along the bottom edge, typically every 12-15 inches, and secure them with appropriate screws for your desk material.
For added stability, consider using vertical support posts that extend from the desk surface to the full height of your divider. These can be attached using heavy-duty construction adhesive and reinforced with screws. If you’re working with a metal desk frame, C-clamps with rubber padding can provide excellent grip without damaging the surface.
For glass or acrylic dividers, specialized clip mounts are available that distribute pressure evenly to prevent cracking. When mounting to wooden surfaces, pre-drill your holes to prevent splitting, and use thread-locking adhesive on screws for extra security. Remember to check your local building codes if installing in a commercial space, as there may be specific requirements for height and mounting security.
Customization and Styling Tips
Design Elements
When designing your desk divider, consider incorporating elements that complement your existing workspace while adding visual interest. Start with a color palette that matches your office décor or choose contrasting hues to create focal points. For a professional look, stick to neutral tones like grays, whites, or natural wood finishes, which can be easily integrated with restored furniture ideas.
Patterns can transform a simple divider into a statement piece. Consider using textured wallpaper, fabric overlays, or geometric designs. Cork boards, pegboards, or mesh panels add both functionality and visual texture while maintaining an organized appearance. For a more natural feel, incorporate woven materials like rattan or bamboo.
Layer different materials to create depth and interest. Combine smooth surfaces with rougher textures, such as pairing sleek acrylic panels with fabric-covered sections. Metallic accents, like copper or brass hardware, can add sophistication to your design. Remember to balance aesthetics with practicality – ensure any decorative elements don’t compromise the divider’s primary function of creating privacy and reducing distractions.
Consider adding personalized touches through removable elements like photos, artwork, or inspirational quotes. These can be easily changed to refresh your workspace whenever desired, keeping your environment dynamic and engaging.
Functional Add-ons
Transform your desk divider from a simple partition into a multifunctional workspace enhancement by incorporating practical features. Add a slim floating shelf along the top edge to hold frequently used items or decorative pieces. Install LED strip lighting underneath this shelf to create perfect task lighting without taking up desk space.
Consider adding pegboard sections to your divider for versatile storage options. Small hooks and pegs can hold everything from headphones and charging cables to notepads and calendars. Magnetic strips or boards make excellent additions for posting important notes, photos, or metal office supplies.
For tech-savvy users, create built-in cable management channels along the divider’s edges to keep wires organized and hidden. Include small cutouts or grommets for power cords to pass through seamlessly. You can also mount power strips directly to the divider for easy access to outlets.
Think vertically by adding stackable paper trays or document holders to maximize storage without sacrificing desk space. Small fabric pockets attached to the divider surface work great for storing smaller items like pens, scissors, and sticky notes.
For added functionality, consider incorporating a flip-down surface that can serve as an extra workspace when needed and fold away when not in use. This feature is particularly useful for tight spaces where every inch counts.
Creating your own desk divider doesn’t have to be complicated or expensive. With the materials and methods we’ve explored, you can craft a personalized workspace solution that perfectly suits your needs and style. Whether you choose the simple cardboard option for a quick fix or invest time in building a more permanent wooden divider, the satisfaction of completing your own DIY project is unmatched. Remember to prioritize stability, functionality, and your workspace’s aesthetic when selecting your design. Now that you have all the necessary information and inspiration, it’s time to gather your materials and transform your desk into an organized, productive space. Your perfect custom desk divider is just a weekend project away!